This document describes how to get started with Kronometrix – SaaS version, for network or service providers, looking to offer Kronometrix services to their own customers.
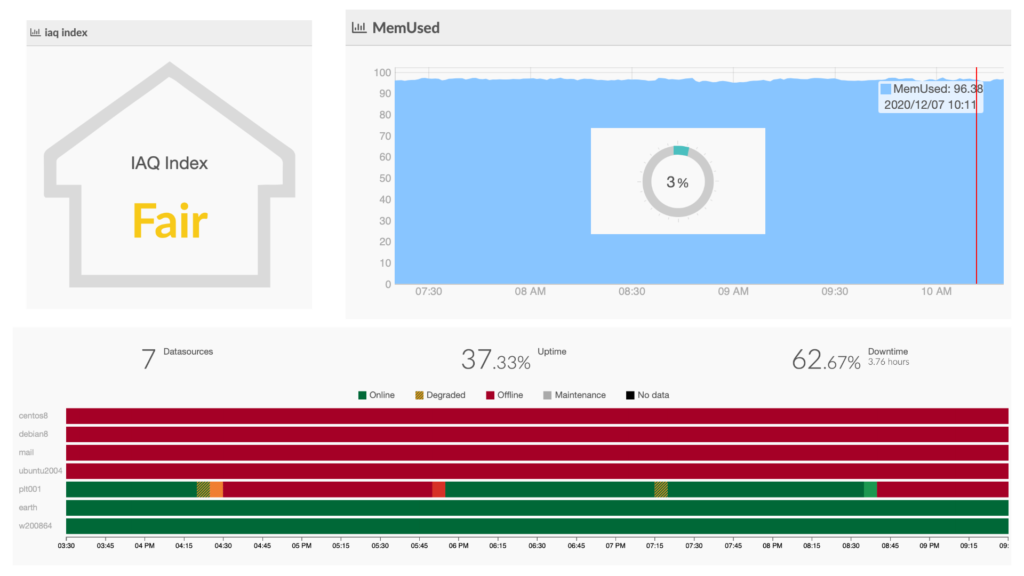
Sometimes companies require to share, display or report performance and availability of own services with their own customers. To make simple how to open and share such data companies can easily use Kronometrix Widgets to display Kronometrix charts, indicators or other UI elements to their own portals.
This simple document describes how a service provider should get started to offer data to their own customers.
Step 1: Create a Kronometrix Account
An initial Kronometrix SaaS account is needed for the network data provider. This account can be a personal account, or a generic account used by many administrators or service managers.
Example
Generic Account
To use a generic account, you can for example select the following:
Username: mycomp_support
Email: support@mycompany.com or some other generic email where one or many people have access
Personal Account
To use a personal account, you can for example select the following:
Username: bill
Email: bill@mycompany.com
This account will be the responsible to create one or many data subscriptions to provision and visualise data for the real customers.
Note: It is highly recommended that more than one person will have access to this account to ensure service continuity.
Check this document how to create your own Kronometrix account.
Step 2: Provision your data
After your company has setup your main account you should plan what and how data will be provisioned. There are different ways what data can you provision to Kronometrix. For more information check this document to get familiar with Kronometrix Data Subscriptions.
Computer Systems
To capture and analyze data from bare-metal or virtual computer systems, please follow these instructions. After you have provisioned data you should have a valid subscription ID where you can visualise and analyze your data.
Web and Enterprise Services
If you plan to capture and analyze data from one or many web sites and HTTP applications or some enterprise services, like IMAP, SMTP, LDAP please follow these instructions. After you have provisioned data you should have a valid subscription ID where you can visualise and analyze your data.
Step 3: Create and use the UI widgets
What is a Kronometrix widget?
A Kronometrix widget is a user-interface component, like a chart, indicator which can be accessed using a unique ID (“Widget ID”) and can be added to 3rd parties portals, using the IFRAME capability. Learn more
Create a Kronometrix widget
After you have your data subscriptions, you can easily create one or many data widgets. A data provider can add these UI widgets to own web portals to display performance and availability data. To create a data widget you need to have access to one or many data subscriptions.
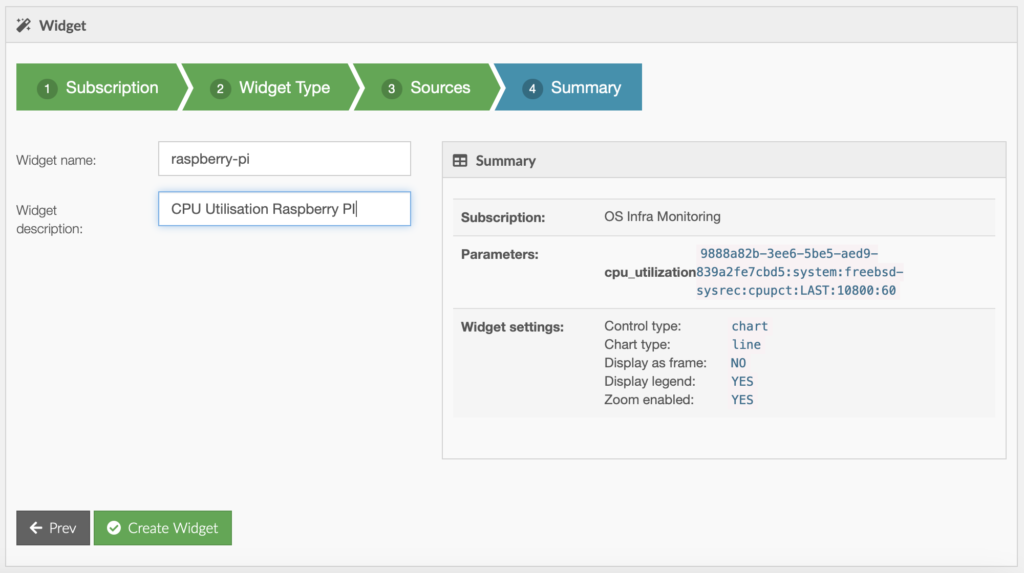
For example we will explain how to create one CPU Utilisation UI widget, using these instructions:
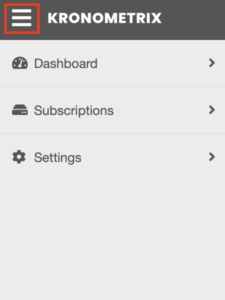
Click on the left side menu, and select Settings
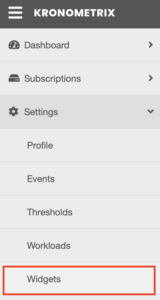
Click Widgets, and select New widget
Select your data subscription

Select the widget type
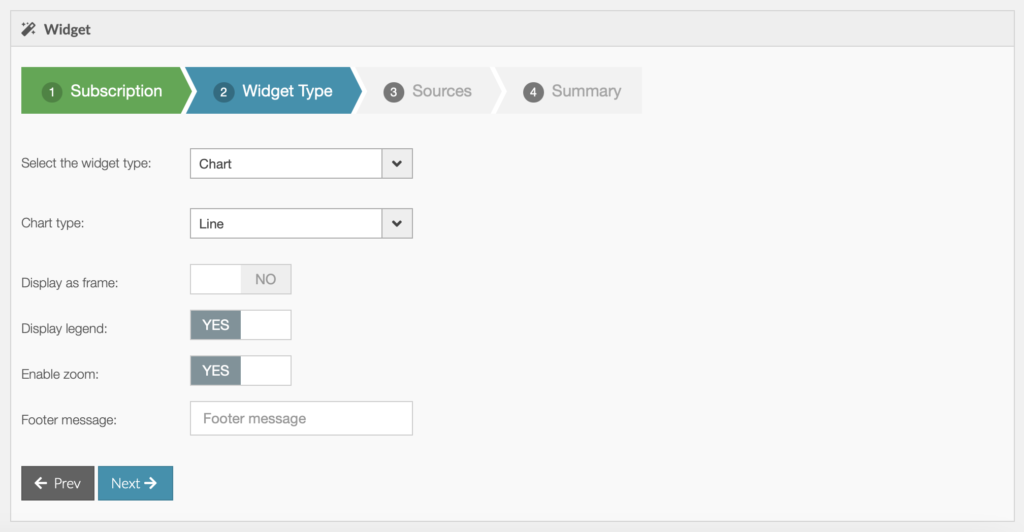
Select your data source
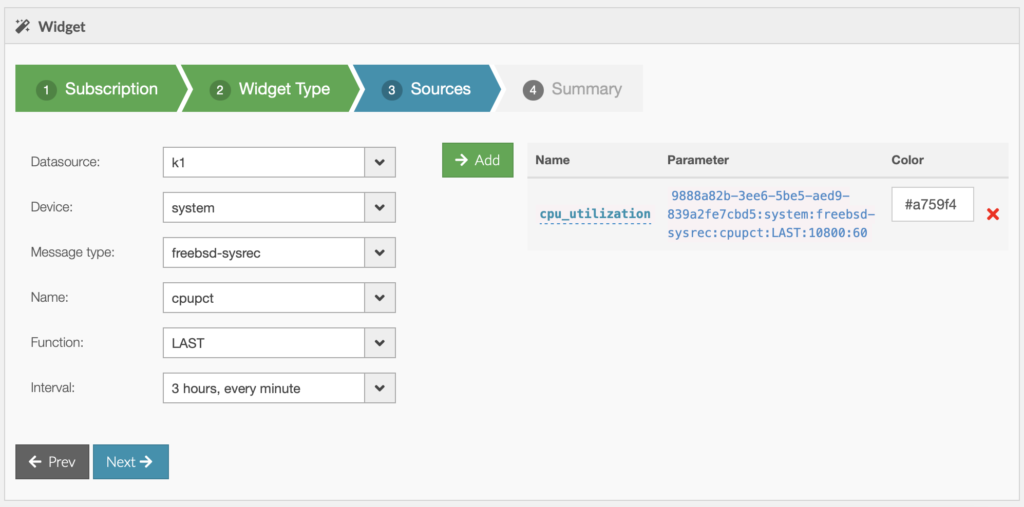
Finalize and review your data widget
At this moment you should have listed a functional data widget which can be used and embedded to any other web portals, using IFRAME framework.
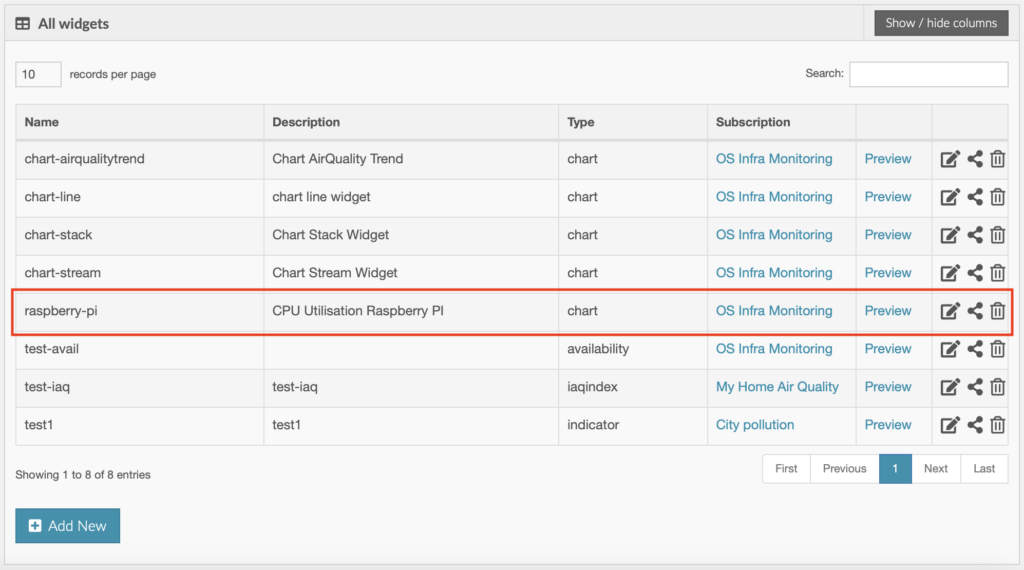
To see your widget simple click Preview:
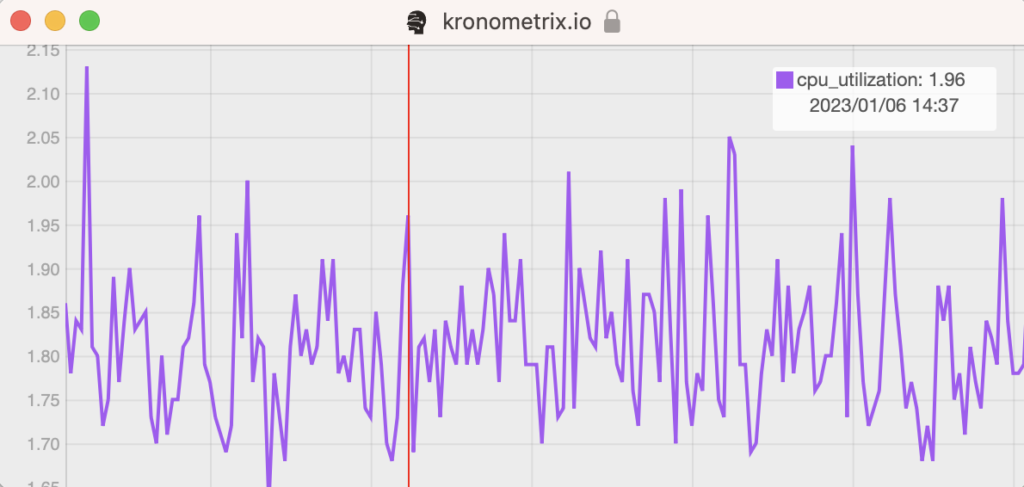
Use your Kronometrix widget
Using previous procedure you can create or many data widgets, from various data sources. There are three main operations which you can perform to a widget:
Edit the current data widget 
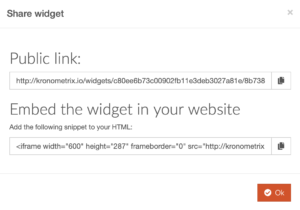
Share your data widget

Delete your data widget

Follow the instructions from “Embed the widget in your website” simple by adding the IFRAME definition to your web site to add the widget.
Have any questions?
If you need help or have any questions about Kronometrix please dont hesitate to contact us.

